
5 Challenges When Sewing With Kantha Quilts
If you belong to the rare species of people who likes to cruelly cut lovely Kantha quilts into pieces and to refashion them into something else (or are at least thinking of doing so), this post may be for you. Ever since I came across my very first Kantha bag, which I purchased in a store at the Old Jaffa flea market, I have been fascinated with using these lovely textiles to create items ranging from jackets, skirts and bags to cushion covers and placemats. Yet, every time I cut a Kantha blanket apart, I feel a little guilty thinking of the woman who took so much pains to create this wonderful piece of textile art. Tough dilemma!
Evidently, Kantha quilts are not suitable for everything. But as Kantha quilts come in many forms, you may learn what quilt to use for which project. One huge advantage of Kantha quilts is the fact that the feature two different sides and can thus be used to create reversible items!
Here are a few of the challenges I have faced while working with Kantha blankets - and some solutions.
1) The dissection challenge
First of all, ask yourself if you really, really are prepared to sacrifice your lovely throw. You might gain decorative new cushions or a soft Kantha jacket, but you will lose a lovely blanket, which might constitute a piece of art worth keeping intact. Some quilts are just too perfect to be dissected! I usually use less-than-perfect quilts with obvious flaws for my creations - that way, I feel a little less guilty about taking them apart. I also make an effort to use every last scrap of Kantha and I sell some of my scraps to other Kantha crafters to make sure nothing gets wasted.
2) The suitability challenge
Kantha quilts come in a range of styles and weights. Before applying your sharp scissors to your beautiful quilt, think twice about what you want to make with it, and whether your Kantha throw is suitable for your purpose. The thicker the quilt, the harder it will be to sew with it. I have had quilts that posed a real challenge to my sewing machine and serger due to their thickness. Here are a few of my personal rules:
- For sewing garments other than jackets, only use the most light-weight quilts - those made of only a few layers of fabric. These almost "behave" like regular, medium-weight textiles. Quilts used for jackets can be a bit heavier.
- For non-reversible bags (i.e. those bags that will show only one side of your quilt) you can use quite a wide range of quilts. I add interfacing to the Kantha blankets that are on the thin side to give the bag a bit more stability.
- For reversible bags, on which you will be able to use both sides of the quilt, I use fairly heavy-weight quilts, as you want your bag to have some substance without additional interfacing.
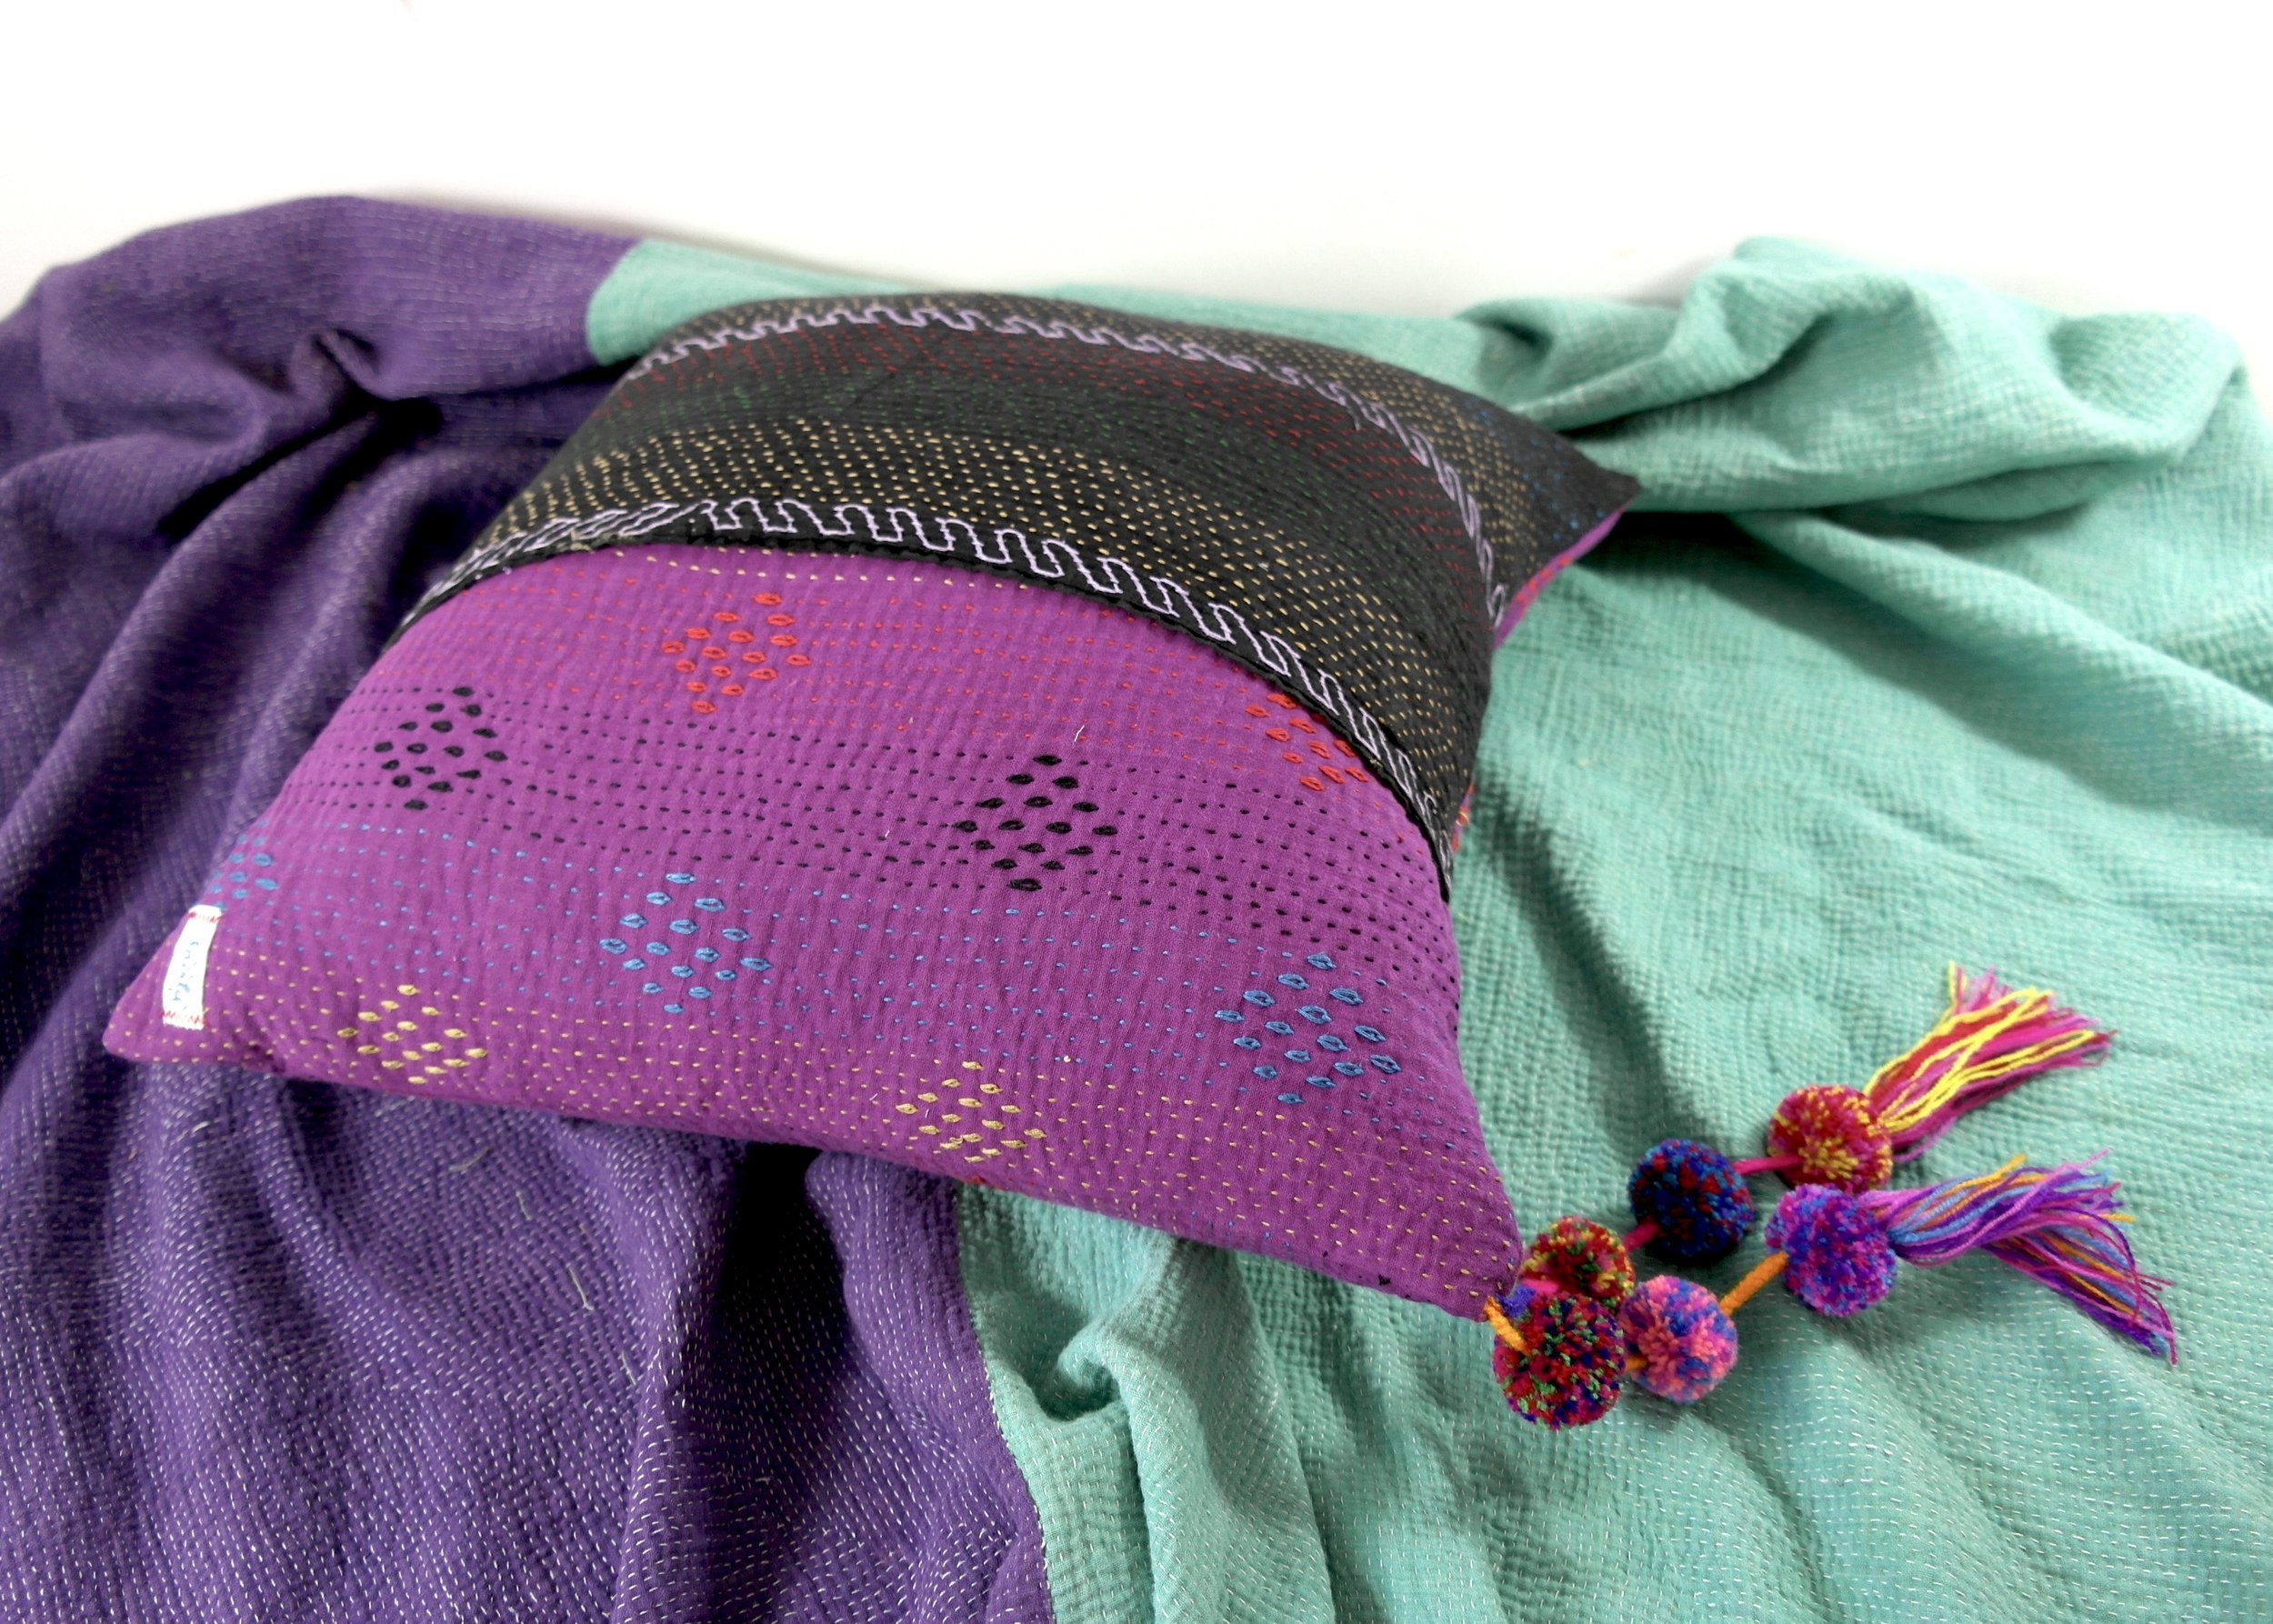
- For cushion covers, again, you can use lighter quilts with interfacing or heavier ones without.
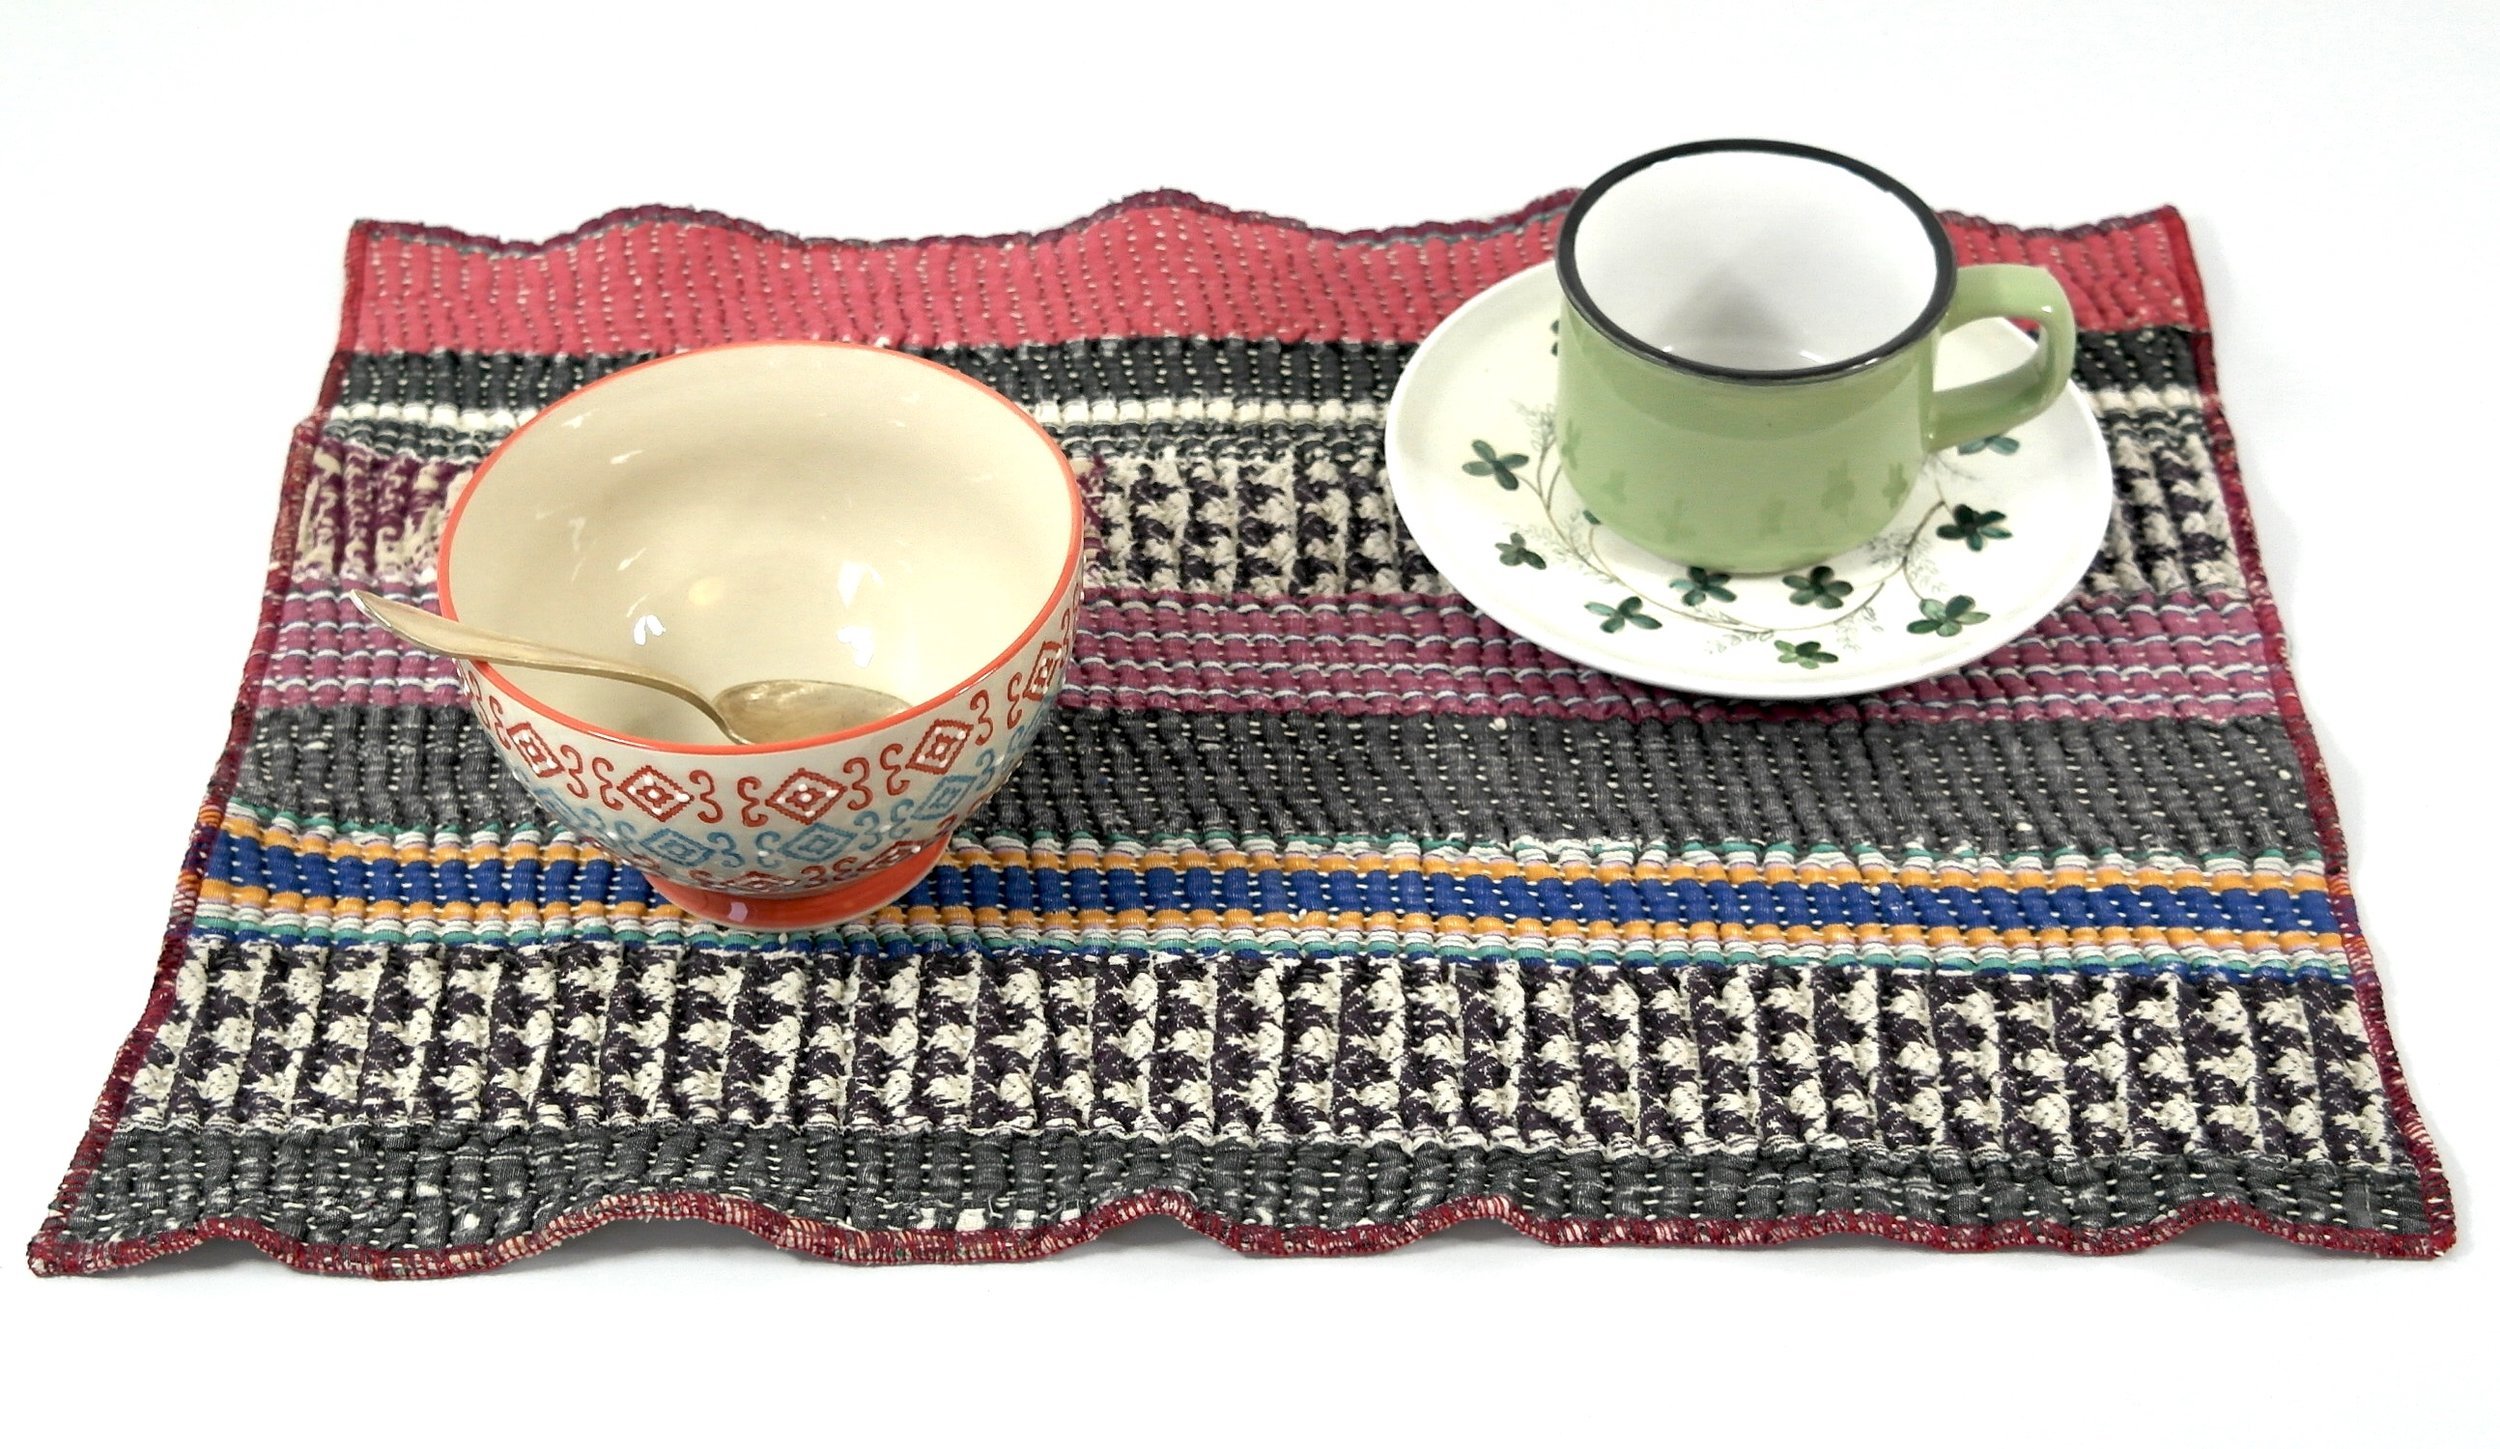
- For my placemats, I generally use only the very thick quilts - I like my placemats to be a bit substantial!
Kantha quilts that have obvious flaws on one of their sides only are suitable for any item that is not reversible!
2) The limited-size challenge
You can only make so much stuff from a single Kantha quilt - they are always one of a kind and - unfortunately - limited in size. Besides, Kanthas often have flaws such as stains and worn spots, which may further reduce the size of usable fabric. If you are planning on sewing an item that requires a bit more fabric, such as a jacket, you have to plan well how to cut the different parts of your pattern from your quilt. You will also have to take into account how the Kantha's own pattern, colour and stitching will look on your cut-out pieces - and here we arrive at the third challenge:
3) The design challenge
A lot of Kantha quilts feature bold fabric and / or stitching patterns. Before deciding how to use your blanket, ask yourself what parts of that pattern you want to feature in your creation, and how it will look on the finished piece. This is fairly straight forward for items such as cushion covers, but gets infinitely more complicated if you are sewing a reversible bag or jacket, where both sides of the quilt have to be taken into account.
Another factor to consider are the flaws your quilt might have, and how you can work around them. So while your double-sided creation may look great on one side, you will notice that your designated pattern pieces cover stained or otherwise compromised spots on the reverse side - meaning that you have to arrange them differently.

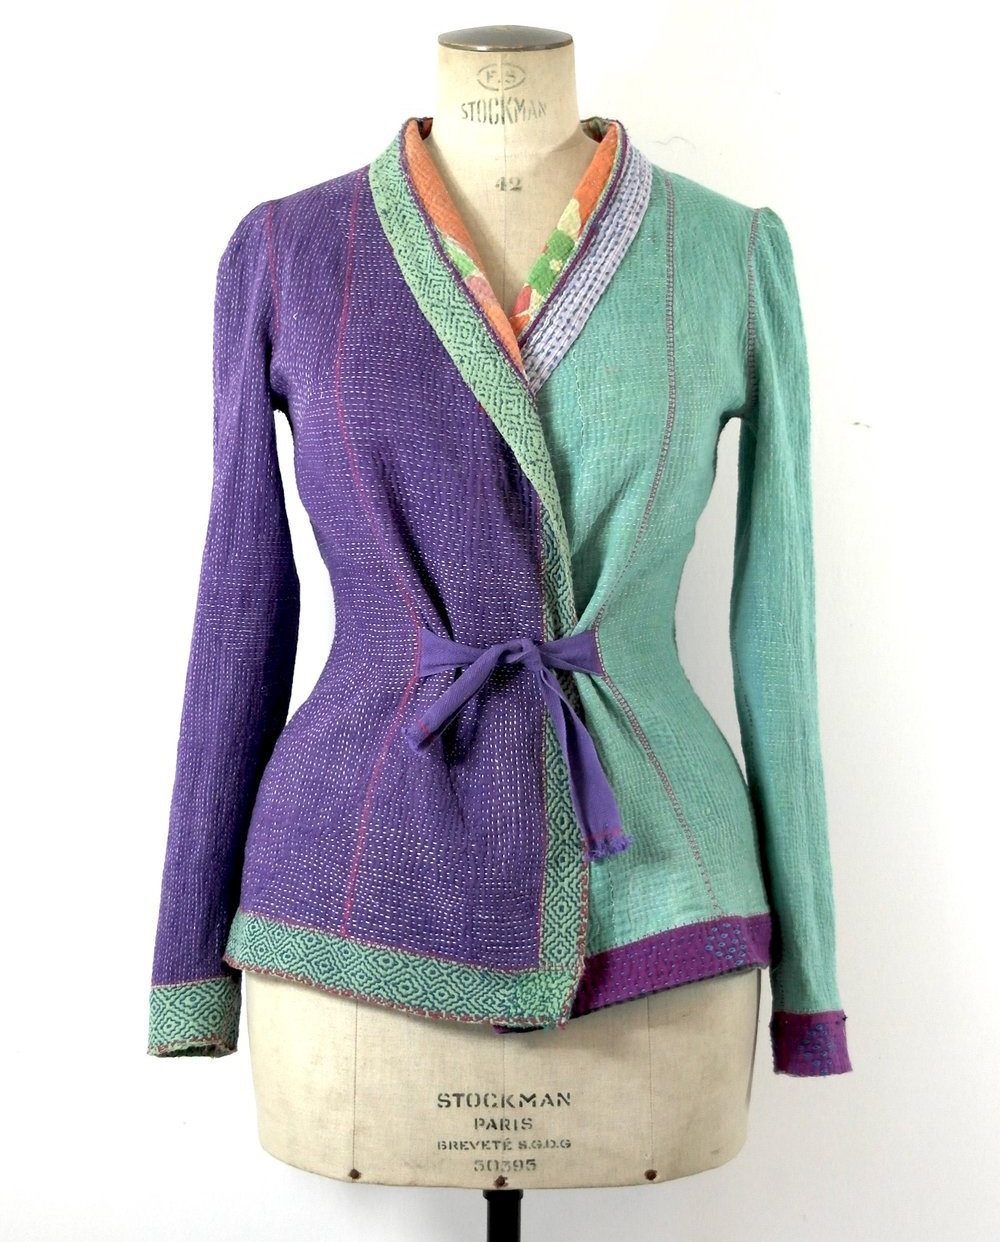
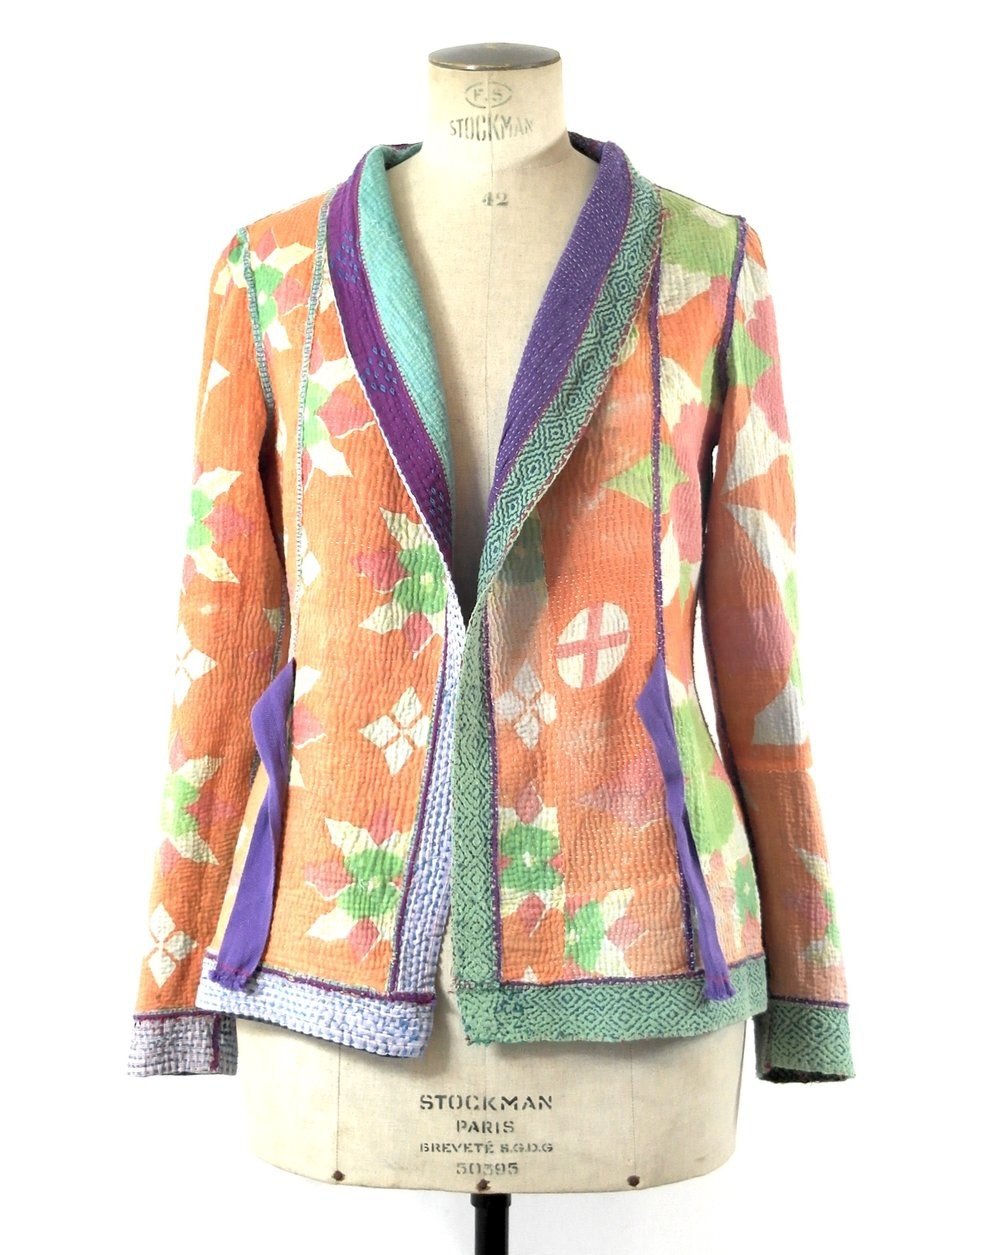
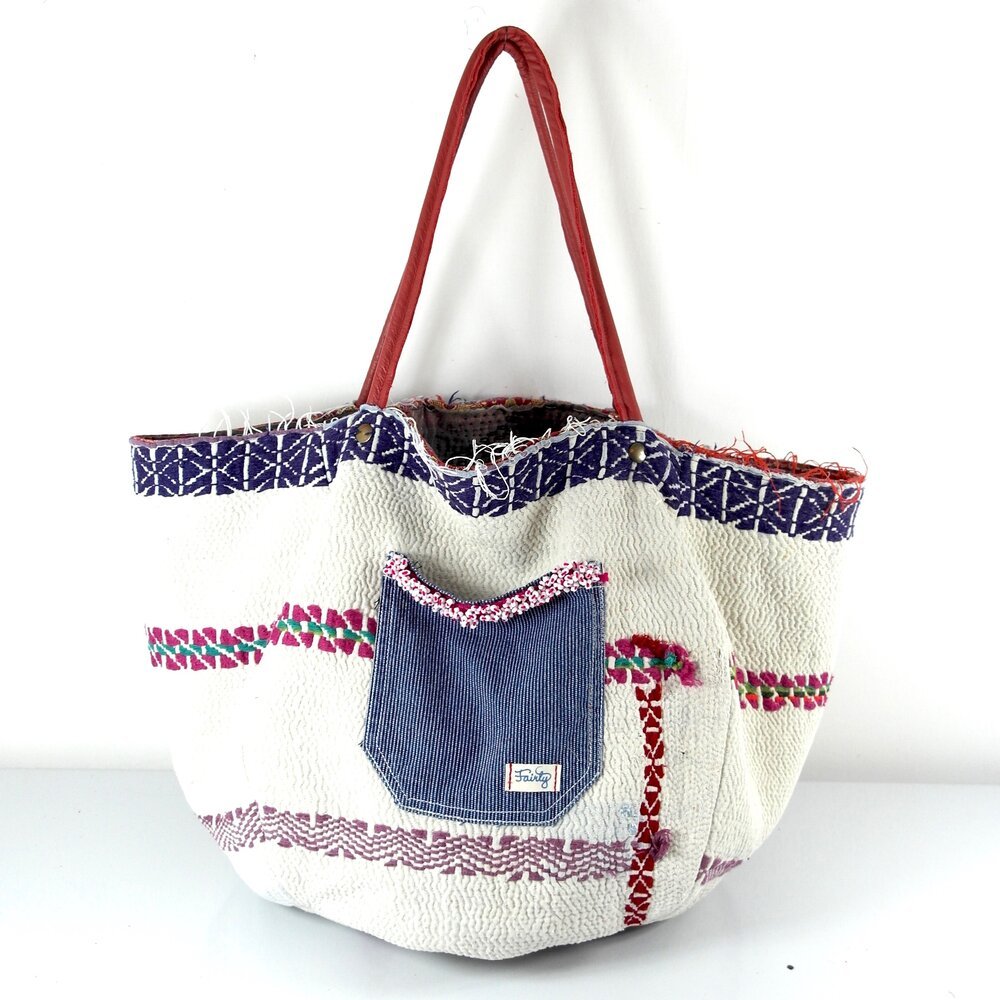
Sometimes, it's almost impossible to combine all these factors into a creation that works well on both sides. It makes things easier if you work with a quilt that has one pretty monochrome side without too much distraction. Below are images of a reversible Kantha jacket made by me with one patterned side and a “plainer” one featuring two colours:
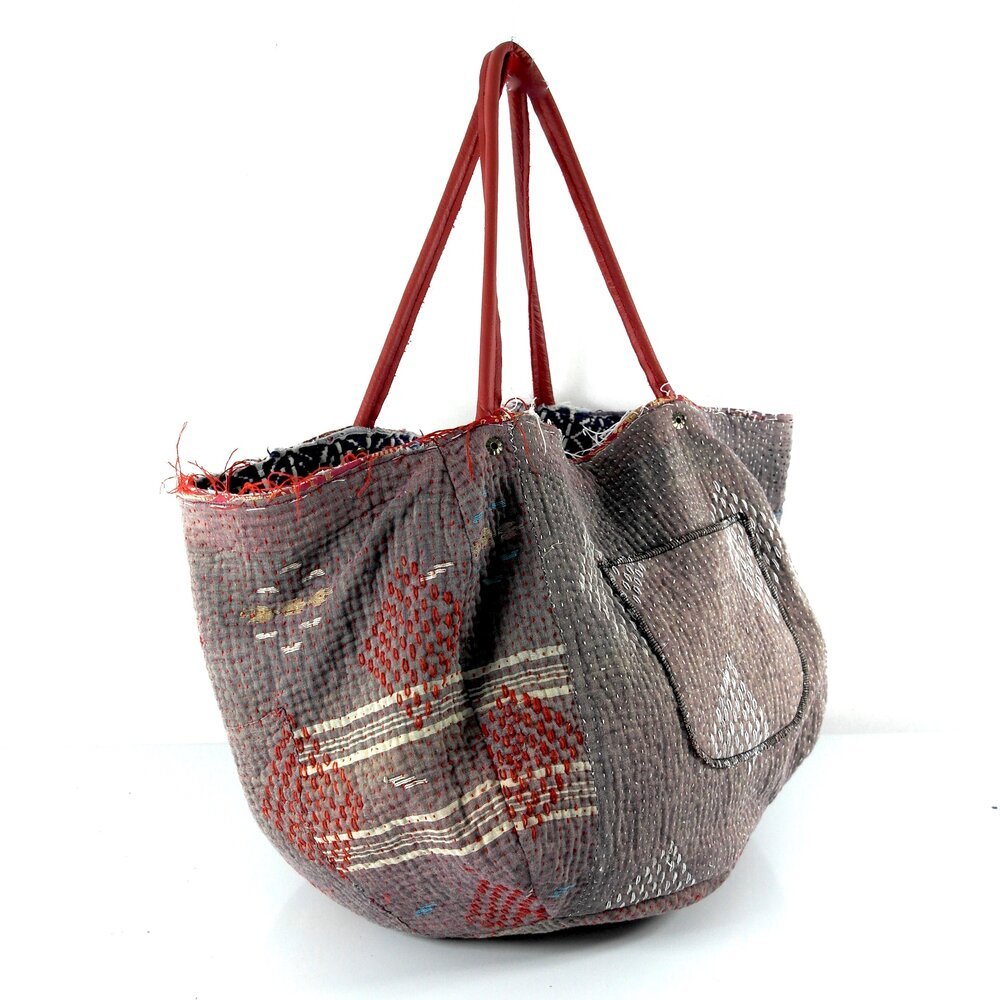
The reversible Kantha bag below is not made from one, but from two different quilts that have been sewn together:
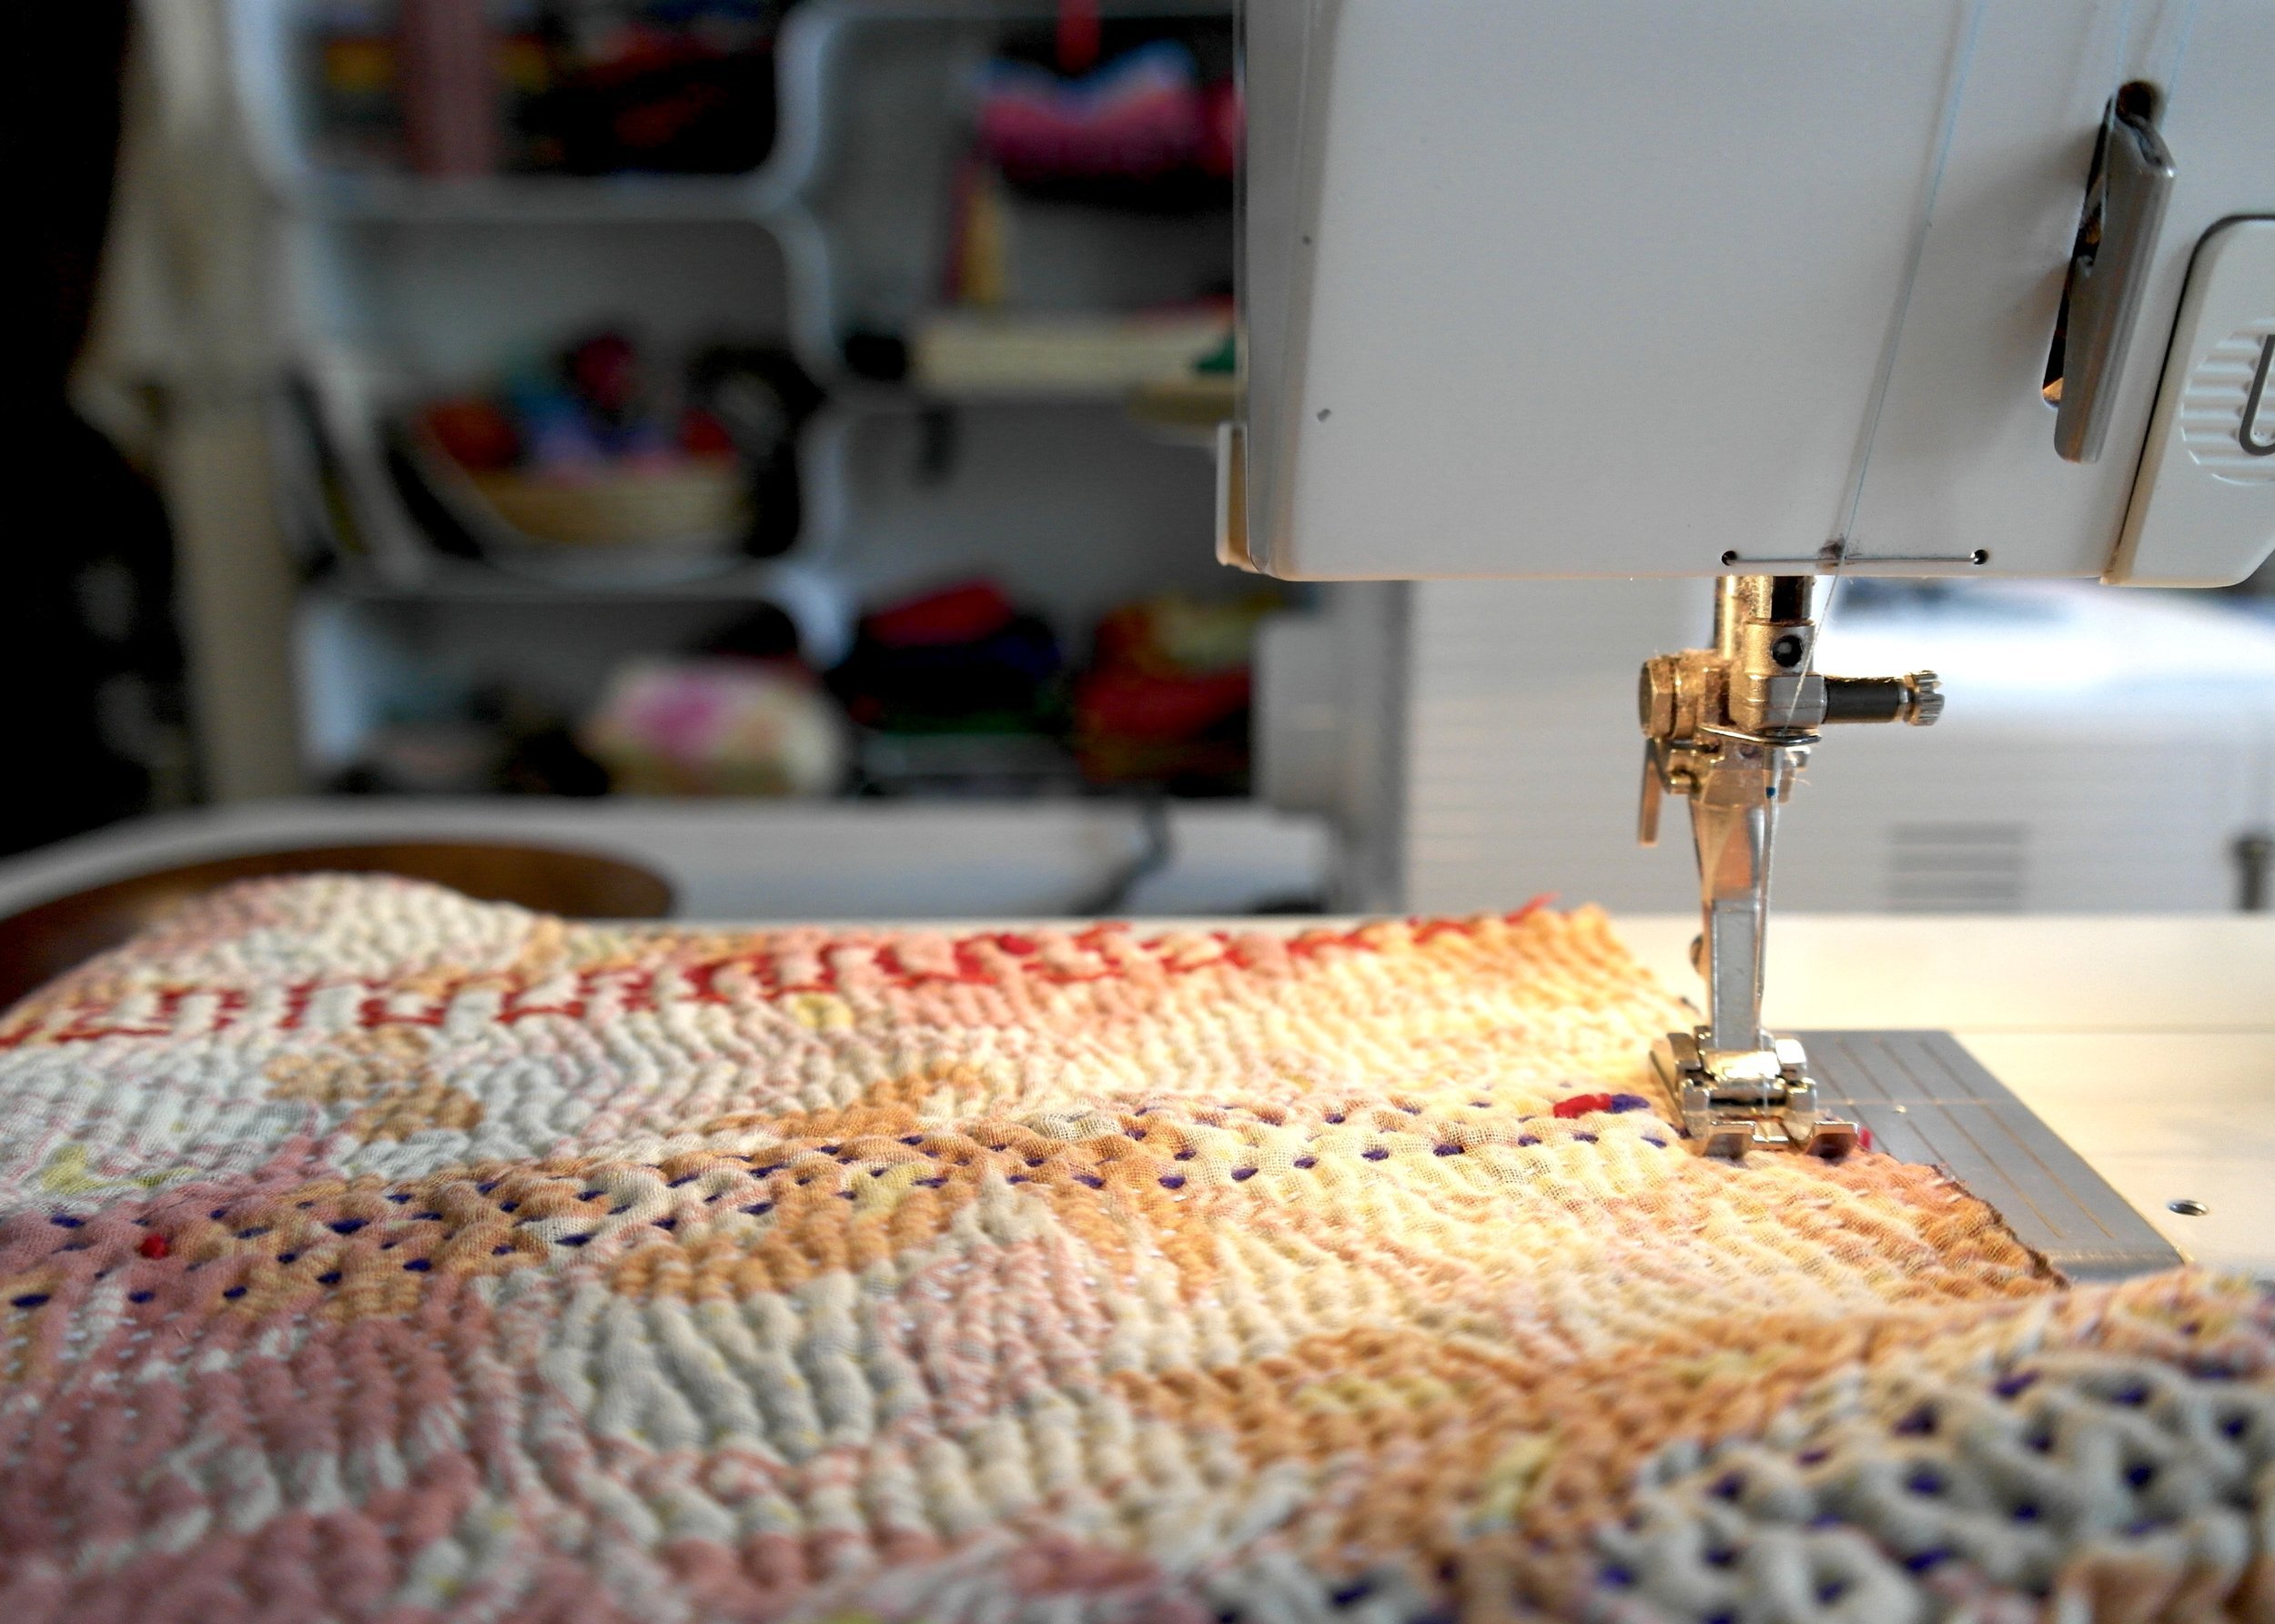
4) The sewing challenge
Once you get to work, you will notice that Kantha quilts can be tricky to sew and serge. I've mentioned the thickness as a challenge - another one is the fact that within a single blanket, thickness can vary, too. Those wrinkly quilts can be very irregular with regard to their texture, which makes regular and tidy stitching much harder. The fact that Kantha quilts, due to their own stitching, feature sort of a rumpled surface does not make the job any easier. Be sure to use strong enough needles for sewing! On the bright side, they also tend to be much more forgiving with regard to lapses of accuracy, as those tend to disappear in the wrinkled landscape!
5) The disintegration challenge
This should perhaps have been the first challenge to mention. Remember, how I talked in Chapter 4 about how Kantha quilts have a tendency to shed sari layers when exposed to friction? Well, this is likely to happen to your creations, too. Bummer? Not necessarily. Sometimes, this worn wabi sabi look turns out really cool. And even if you keep your Kantha as a blanket, it will be exposed to the forces of nature!
